Flat-bottomed end mill sharpening tutorial
Mar 31, 2021
Leave a message
Flat-bottomed end mill sharpening tutorial
Classification of end mills
1. Flat end milling cutter
Carry out fine milling or rough milling, milling grooves, removing a large amount of blanks, fine milling of small area horizontal planes or contours;
2. Ball end milling cutter
For semi-finishing and finishing of curved surfaces, the small cutter can finish milling small chamfers on steep surfaces/straight walls;
3. Round nose milling cutter
Carry out rough milling with smaller surface changes, fewer narrow and recessed areas, and more relatively flat areas;
4. Flat-end milling cutter with chamfer
It can be used for rough milling to remove a large amount of blanks, and also for fine milling of small chamfers on the flat surface (relative to the steep surface);
5. Forming milling cutter
Including chamfering cutters, T-shaped milling cutters or drum cutters, tooth cutters, and inner R cutters. A milling cutter whose cutting edge profile is designed according to the profile of the workpiece is called a forming milling cutter. Like the forming turning tool, it can ensure the dimensional accuracy, uniform shape and high productivity of the workpiece to be processed. The forming milling cutter is widely used in production, especially in the processing of turbine blades.
6. Chamfering knife
The shape of the chamfering cutter is the same as the chamfering shape. It is divided into milling and chamfering milling cutters, which are mainly used for hole chamfering or deburring. In addition, countersinks and plane countersinks (used for countersinking or sinking) Head), inner cone face countersink (used to invert the outer corner of the bolt), etc.;
7. T knife
T-shaped cutter is a tool assembled on a milling machine for milling T-shaped grooves and side grooves of workpieces. T-shaped cutters are also called T-shaped milling cutters, semicircular milling cutters, and keyway milling cutters, which can perfectly process T-shaped grooves and side grooves. Normally maintain cutting performance at high temperatures;
8. Coarse leather knife (also called wave knife)
Rough milling cutter designed for aluminum-copper alloy cutting can be processed quickly, suitable for roughing, processing efficiency, good chip removal performance, large chip removal, and high metal removal rate. There are two common materials for milling cutters: high-speed steel , Carbide. Compared with the former, the latter has higher hardness and strong cutting force, which can increase the speed and feed rate, increase productivity, make the knife inconspicuous, and process difficult-to-machine materials such as stainless steel/titanium alloy, but the cost is higher and the cutting force changes rapidly. It is easy to break the knife under the situation;
9. Taper milling cutter
Carbide taper flat-bottom milling cutter mainly processes: taper deep groove, taper hole, inclined surface processing, etc.; carbide taper ball end milling cutter mainly processes: impeller, blade, cavity, etc.
Before sharpening, the grinding wheel needs to be inspected. If there is wheel runout, irregular cylindrical surface, or excessive rounded corners, it needs to be trimmed. Generally, a grinding wheel modifier (diamond dresser, gear dresser, etc.) can be used to dress the cylindrical surface of the grinding wheel, or a waste grinding wheel with relatively large abrasive grain hardness can be used for dressing. If the side plane of the grinding wheel is already uneven, the grinding wheel can be replaced.
End mill face grinding technology:
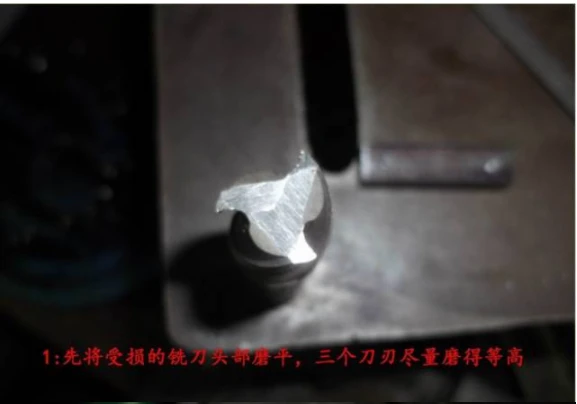
The technology of flattening the end face of an end mill
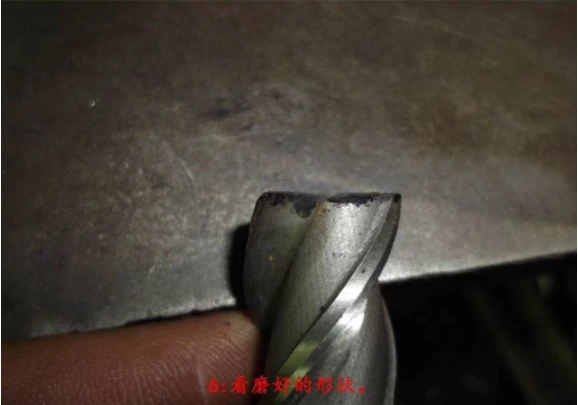
Regardless of the number of edges of an end mill, the end face of the blade must first be ground perpendicular to the axis. This is the key to ensuring that the highest point of the blade can be in the same plane. There are the following methods for correcting the perpendicularity of the end face of the blade relative to the axis of the milling cutter.
① Visual inspection. With the help of a flat plate, put the edge of the end mill on the flat plate and observe the left and right inclination angle. Then rotate the milling cutter 180° and observe its left and right tilt angle. If the inclination angles observed twice in the same direction are different, grinding is required until the inclination angles observed twice in the same direction are the same. Then rotate the milling cutter 90° and repeat the above action.
② Correct with a square ruler. Calibrate with a 90° square on a flat plate, place both the milling cutter and the square, and observe whether there is a gap between the milling cutter and the square or whether the gap is uniform, so that the verticality of the milling cutter can be judged, as shown in the figure 1 shown.
③ Self-calibration. Clamp the end mill on the drill press or milling machine chuck, put a waste grinding wheel underneath, select the appropriate speed to turn on the machine, and then move the milling cutter down to grind on the grinding wheel, and perform grinding according to the end face grinding situation.
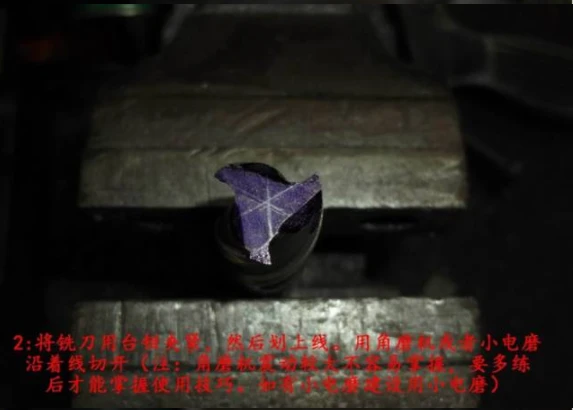
The technology of opening cross flutes for
end mills If there is no round flute on the front of the four-blade end mill, it is necessary to use the fillet of the grinding wheel to reopen the cross flute in the direction of the spiral flute of the milling cutter. The depth is about 1~2mm (too deep It is easy to crack, and it is not easy to grind out the auxiliary corner when it is too shallow). When grooving, make sure that the side of the grinding wheel does not touch the other cutting edge below (Note: This cross groove has chip removal effect, if it is not opened, the inclination of the edge recessed in the middle should be increased).
The sharpening technology of the end face cutting edge of the end mill
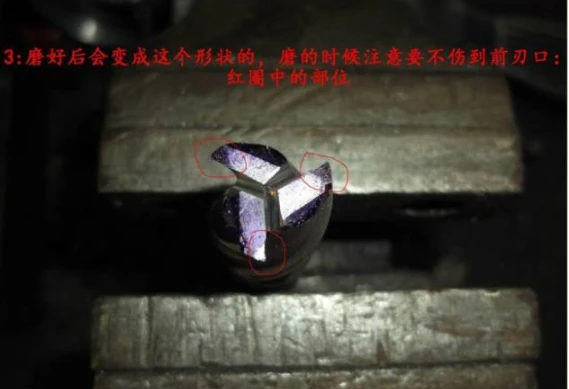
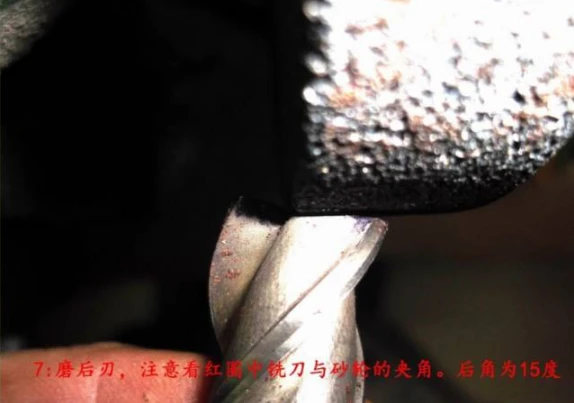
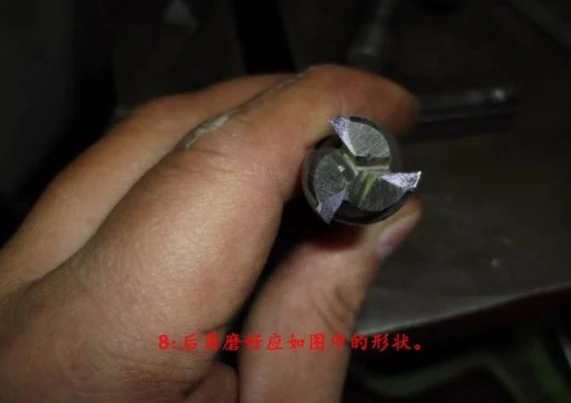
①When sharpening each edge separately, the tip of each edge is used as the reference, and the principle of retaining the tip is to sharpen the rake angle (if there is no chipping, it can not be sharpened), and the relief angle , Secondary relief angle (if it is a large amount of cutting requires better strength, it is recommended to increase the wedge angle of the blade in front of the sharpening tool) and the blade inclination.
②The choice of related angles is 6°~8° of relief angle, (sub-relief angle of 30°~45°) blade inclination angle of 1°~3°. The choice of relief angle should be changed according to the hardness of the workpiece. The greater the hardness of the material, the smaller the angle; the principle of angle selection for blade inclination is that all four blades must be recessed in the middle. The flatter the angle, the better the roughness accuracy. . At this time, the deeper the processing depth (such as greater than 2mm but within the allowable range), the roughness accuracy will be better, because the entire cutting edge is involved in the result of cutting.
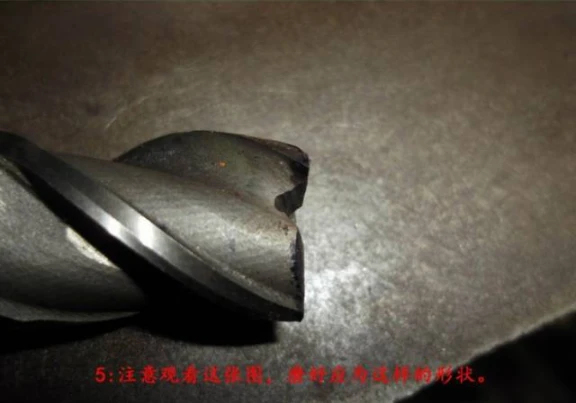
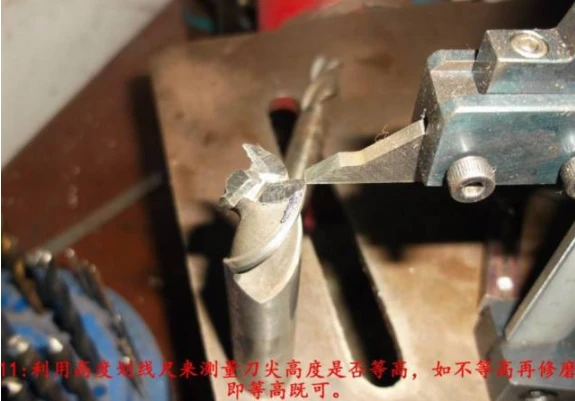
③After the sharpening is completed, the milling cutter is erected on a platform. If the axis is vertical, all the cutting edges can be level, and the deflection angle of the cutting edge can be evenly centered, so that it can meet the requirements.
At this time, you can also use a 90° square to correct on a flat plate, and then observe whether there is a gap between the cutter and the square or whether the gap is uniform. Generally, observe the two relatively tall feet first (the two feet that touch the bottom first). If they are not vertical, polish the taller feet until the two opposite feet are the same height (that is, vertical). At this time, these two feet If there is a height difference with the other two opposite feet, the milling cutter will swing. At this time, grind the two taller feet down at the same time. Similarly, rotate the milling cutter 90° to observe the verticality of the other two opposing feet, and finally make the four feet touch the bottom at the same time and make the milling cutter vertical. Milling cutter after sharpening.
In manual sharpening, the height and angle of the blade are not easy to grasp. During training, it varies from person to person. Just pay attention to grinding a little back angle. When the top edge is not flat, you only need to make the tip of the tool the highest. In addition, if it is not the case that the inner cavity is cleaned, you can also grind the tip of the tool with a chamfer greater than 0.2mm to increase the strength of the tip.
Sharpening technology of main edge (ie side edge) of end mill
If the main edge of the end mill is worn, it is necessary to grind it along the spiral line on the grinding wheel (a smaller wheel diameter is better) (it is difficult for beginners to grind). However, there is generally a taper after grinding, and the smaller the taper, the higher the level of operation.
Graphic case: